
On the rear of the original house there was a stained-glass window. We’re not exactly sure who made it, but it was built by hand many years ago by an apprentice blacksmith for his Gesellenstück, or journeyman‘s piece. After all these years of various rambunctious tenants and being exposed to the elements it is still in pretty good condition.
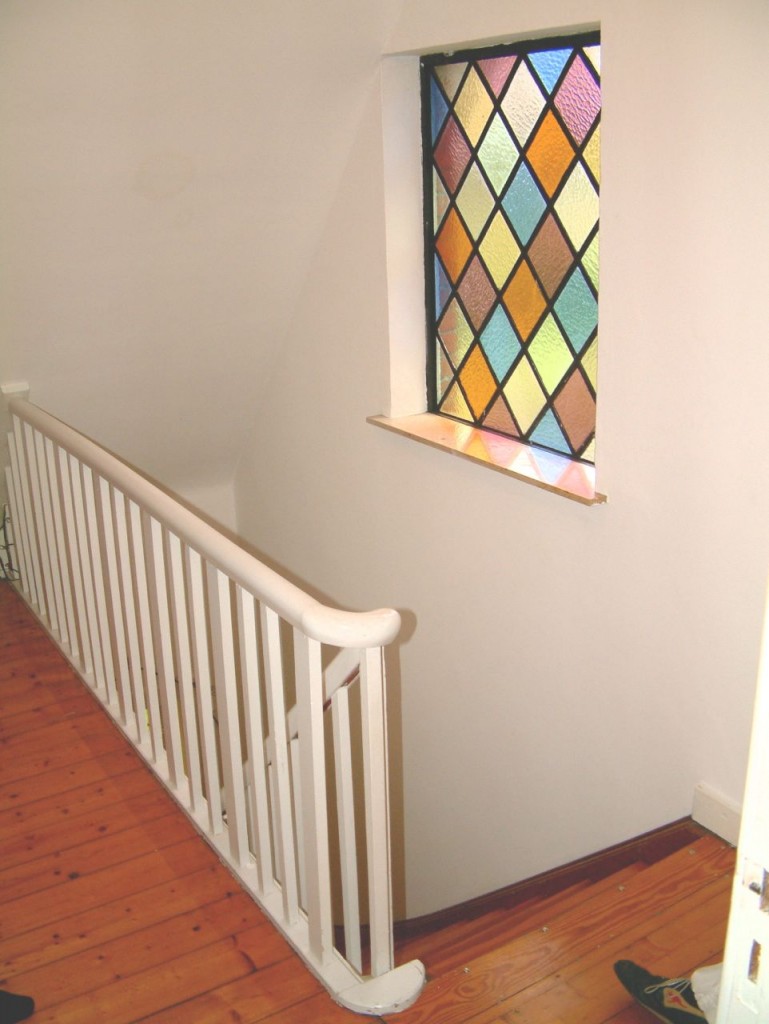
Here’s what it looked like in 2005.
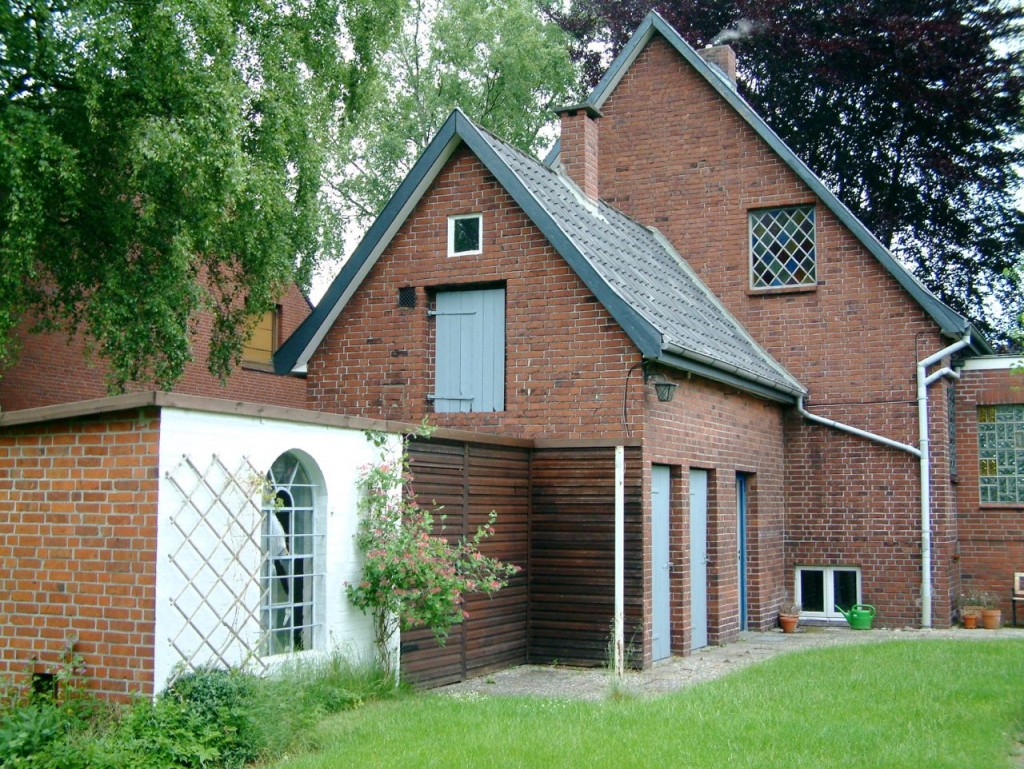
Here is what it looked like from the outside a few years ago.
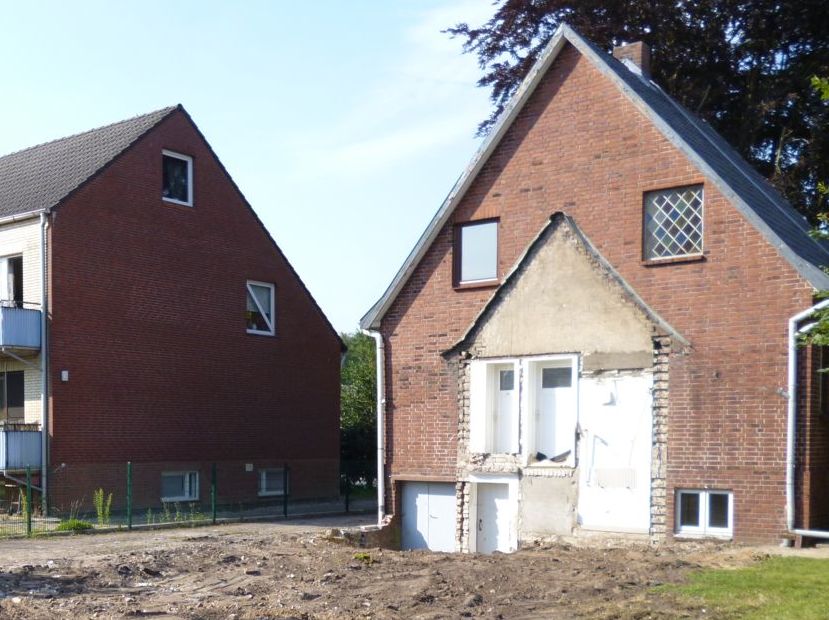
Here is what it looked like after demolition started on the back part of the house.
So, considering the history of the window, it seemed a shame to just tear it out and brick the hole up. I had the brilliant idea of keeping it in and building in a backlight to help illuminate the stair area. With all the bullshit that went on with this whole project, how to backlight this window was one of those things that were put on the back burner and almost completely forgotten about. A few weeks ago, we realised that a wall will need to be built on the other side of that window and we only had a short amount of time to find a suitable solution.
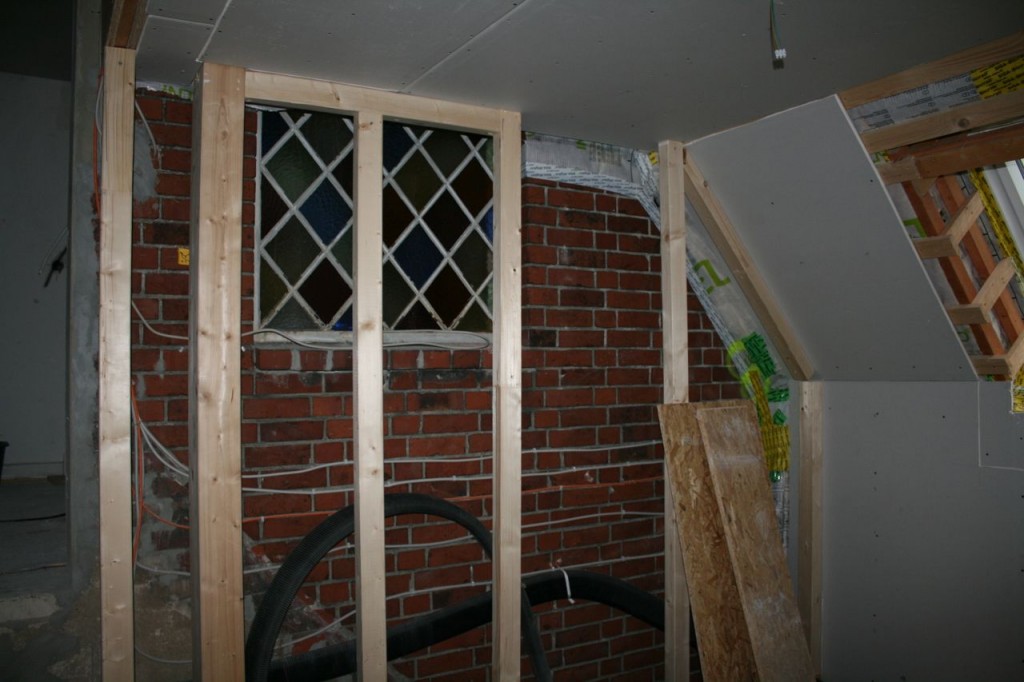
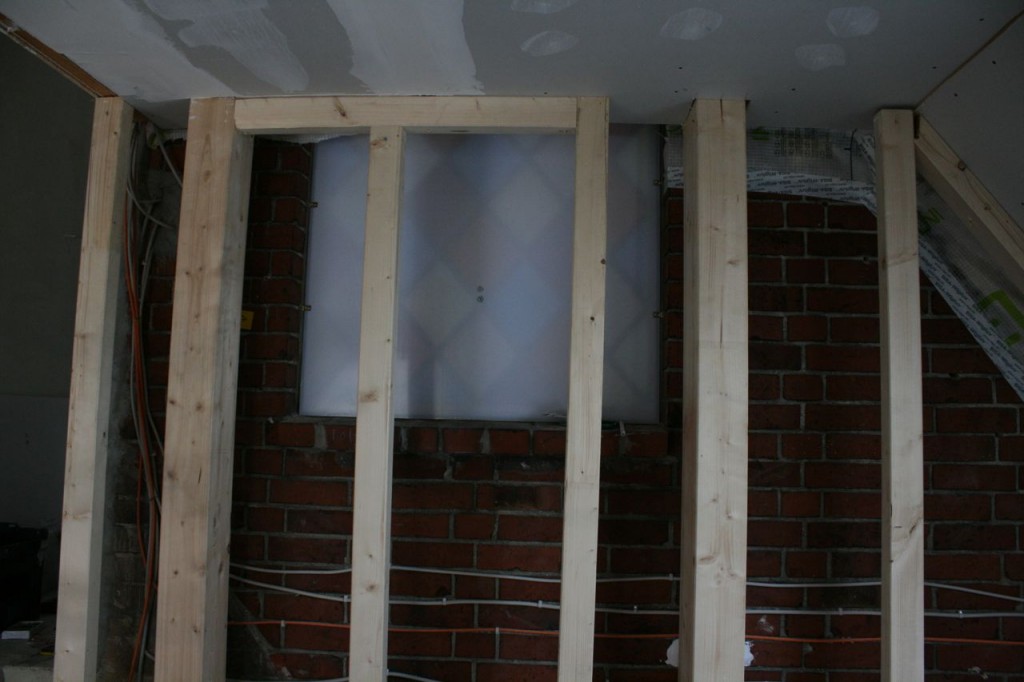
Here is a view of the window from what was once outside. You can see the studs there for the wall that will be built. Ideally, I would have liked to finish this project before those were installed, but things moved a bit faster than expected.
Originally, I wanted to build a box that would fit right behind the window that had a white plexiglass sheet on the side directly against the window. In that box I would put lighting of some sort.
I ended up not pursuing this solution because I would have trouble installing it with the wooden supports in the way and it would be almost impossible to access the light source in case I needed to repair or replace something. So, I decided to just keep it simple.
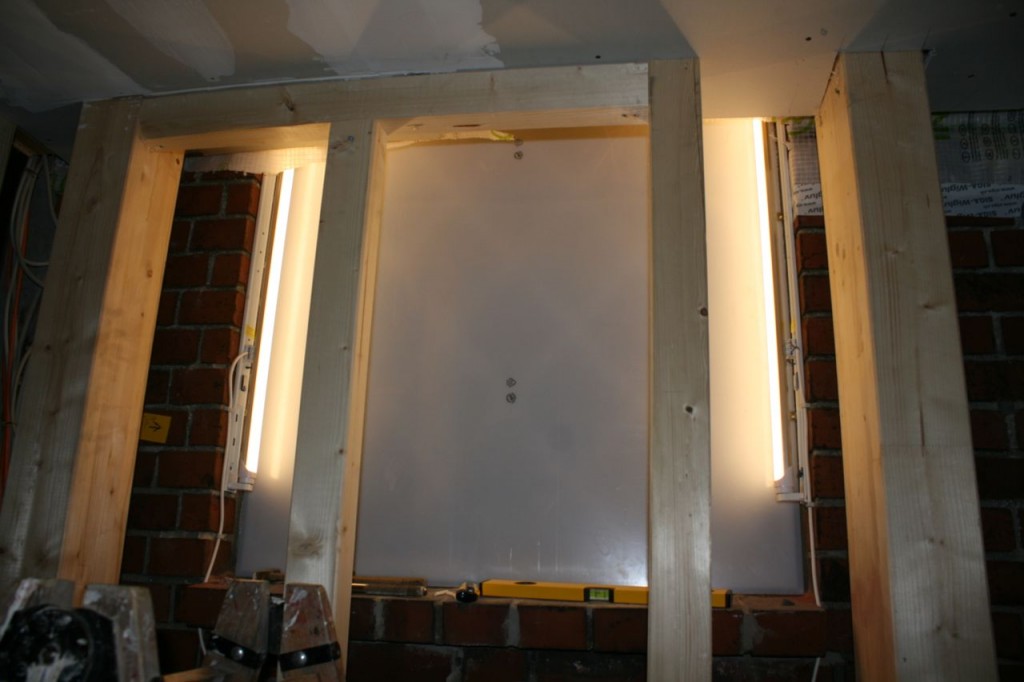
First I installed a piece of white plexiglass that was slightly smaller than the window recess. I fastened it to the brick with metal brackets.
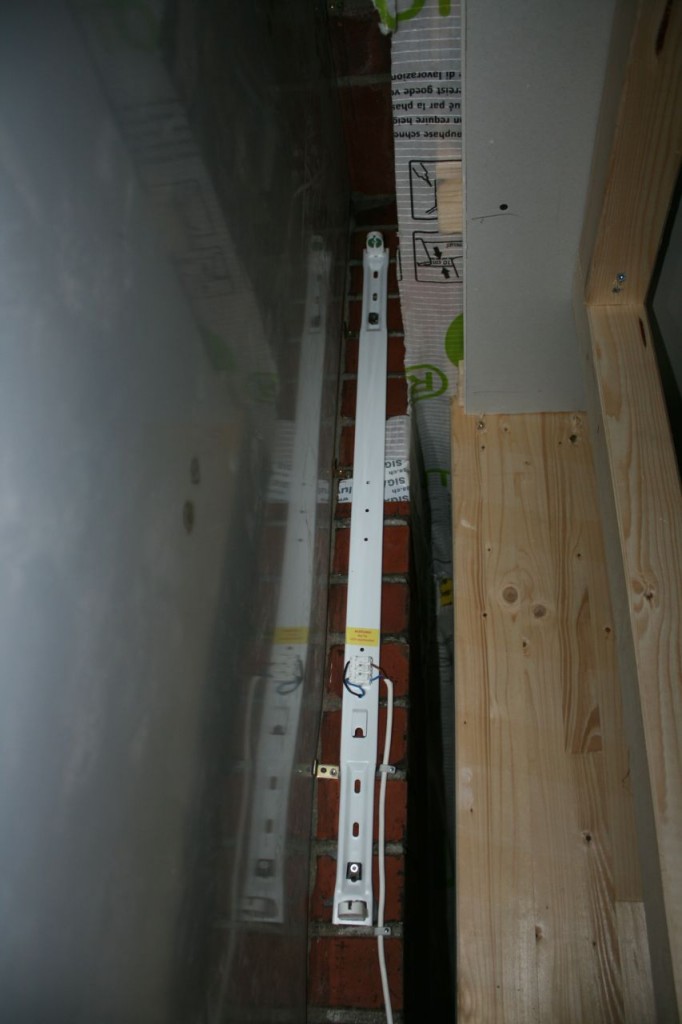

Then I attached a fixture for 90cm LED tubes on each side.
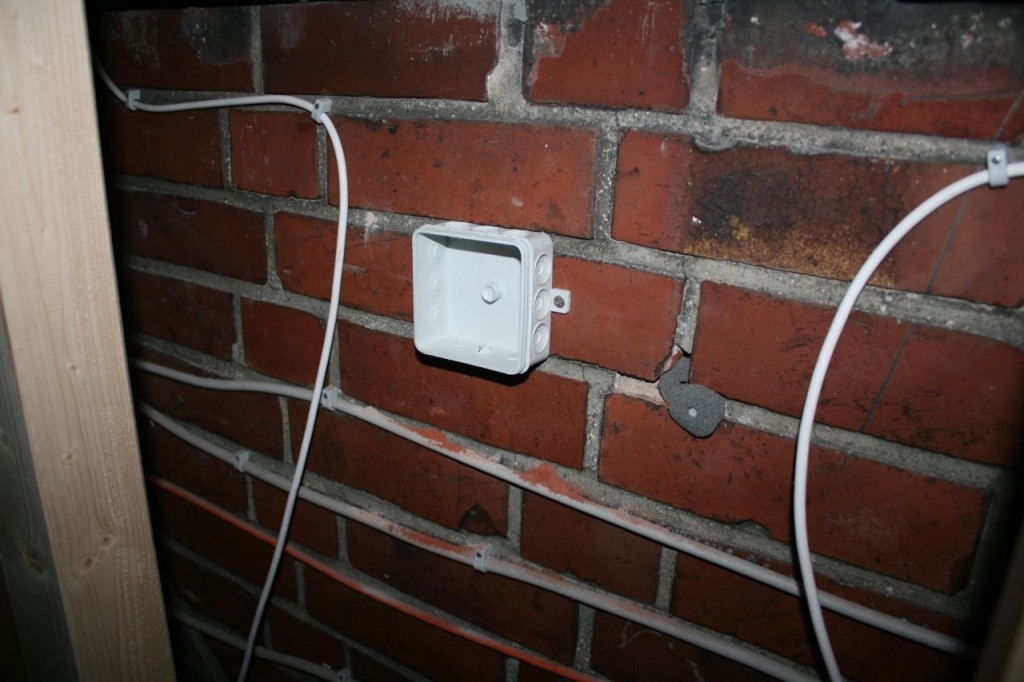
Then I wired it up. We used a junction box and placed it right beneath the window in case I need to access it in the future.
Then came the moment of truth….
Alright! It worked on the first try and nothing exploded!
Also on the rear side is a piece of white particle board covering the window to help keep out debris and reflect more light towards the front.
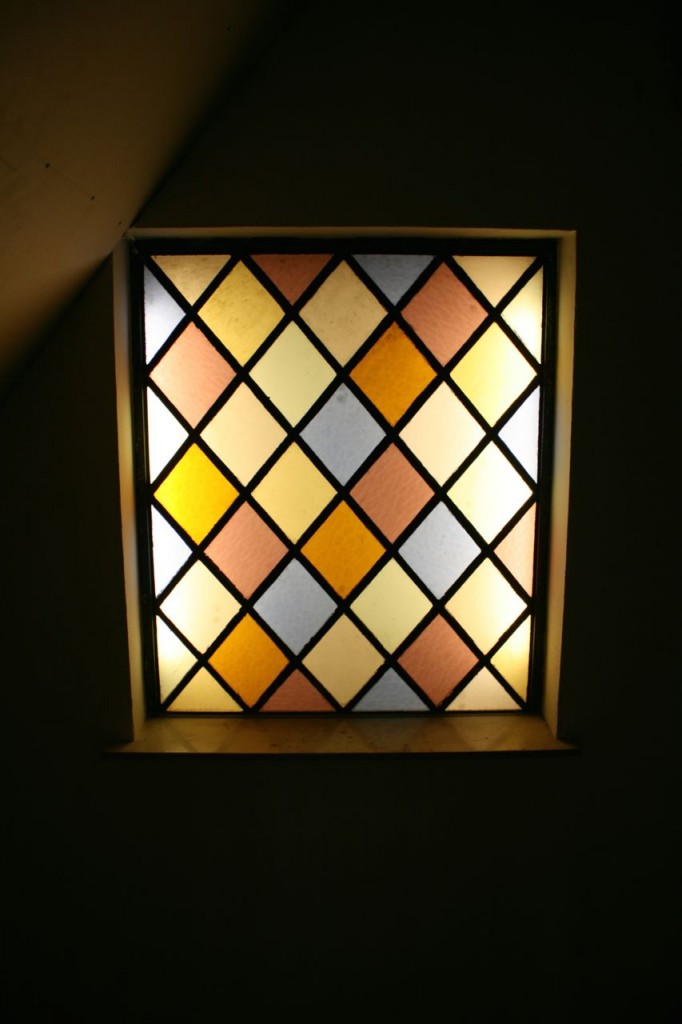
Here is the view from the other side. The darker spots are from the protective foil on the back of the plexiglass and from dirt on the side towards the camera. Those have been since removed.
This looks like it was pretty easy, and looking back on it I guess it was, but as with all DIY projects there was plenty of swearing and such. Das gehört dazu.
Ahhhh, the apple didn’t fall far from the tree – great solution and preservation !
DAD
wonderful!